
Table of Contents
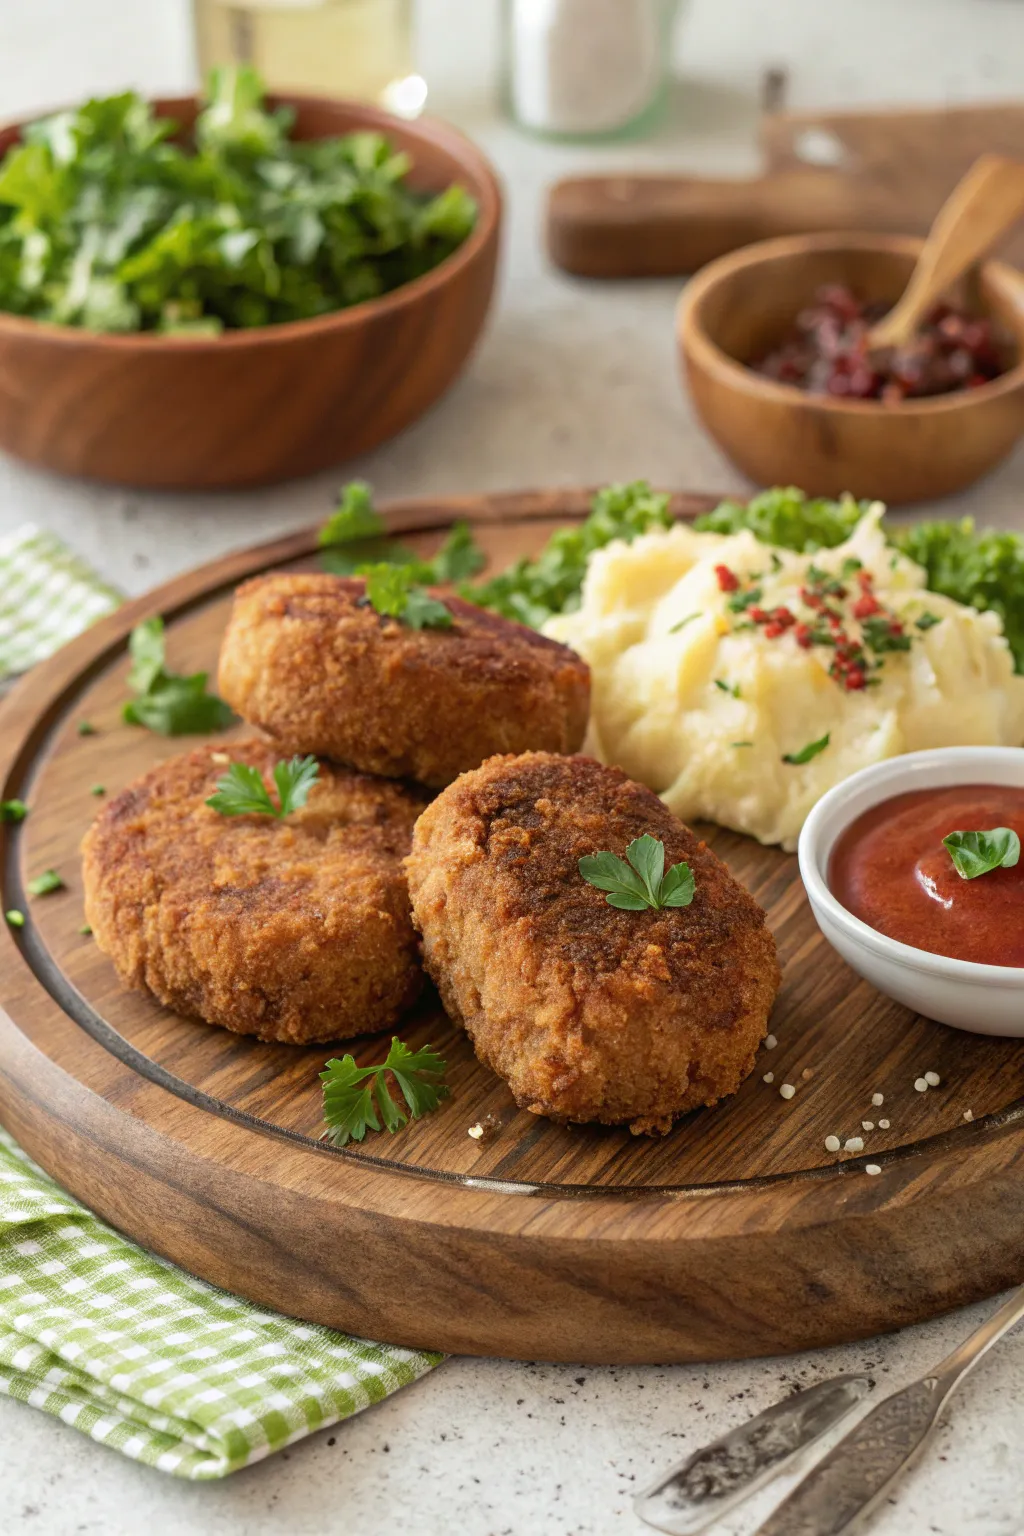
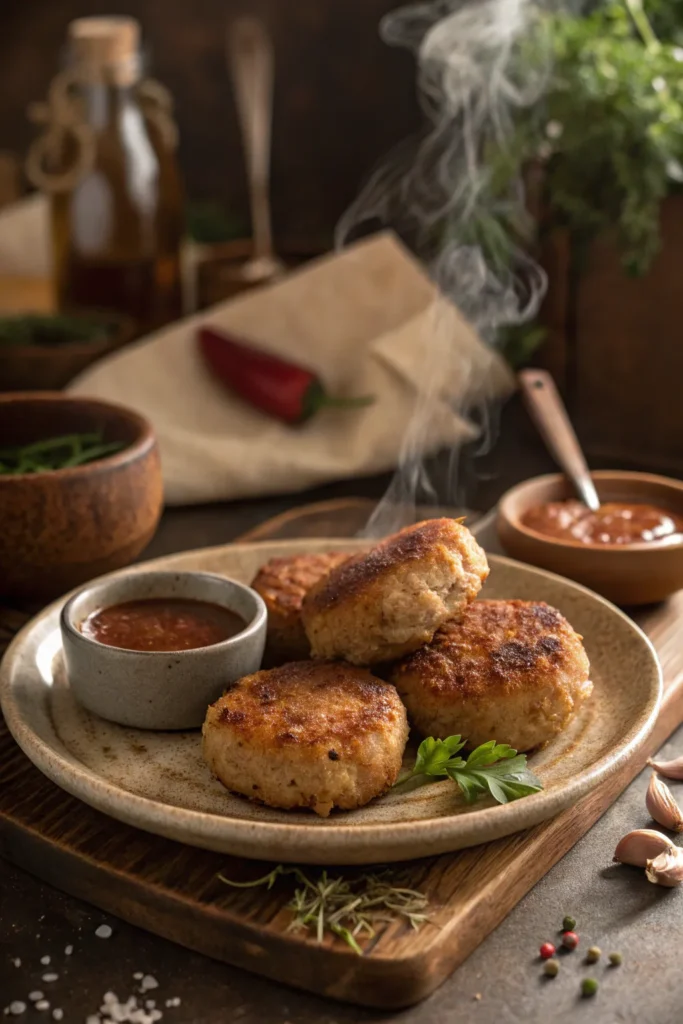
If you’re craving something crispy, juicy, and satisfyingly savory, this beef cutlet recipe is just the thing. Whether you’re serving them as a snack, stuffing them in a sandwich, or plating them up with a side of mashed potatoes, beef cutlets are the kind of comfort food that always hits the spot.
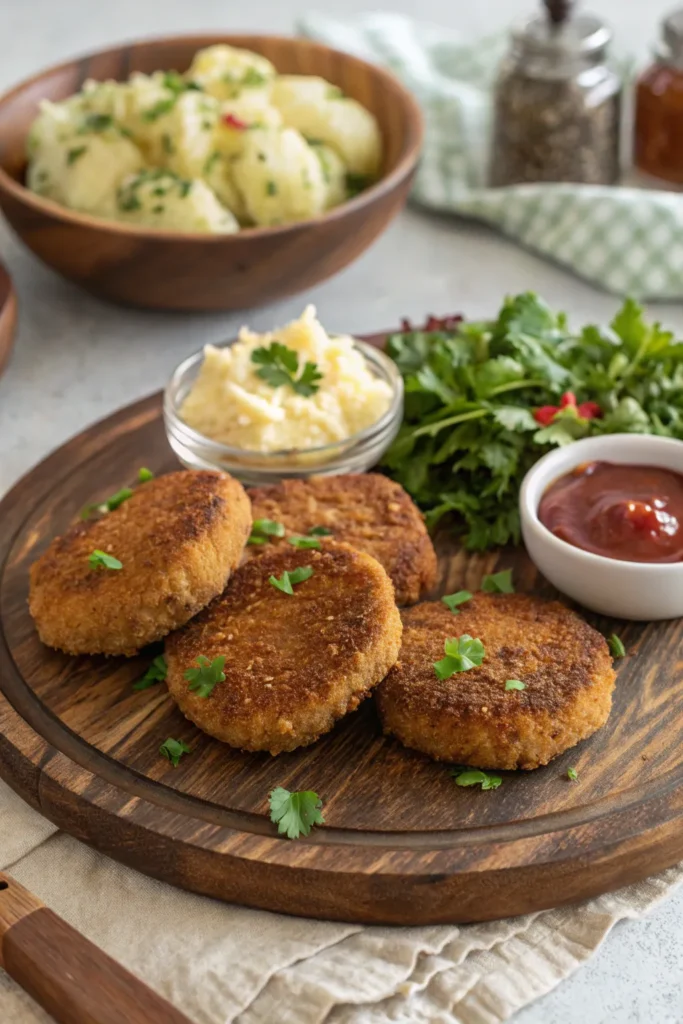
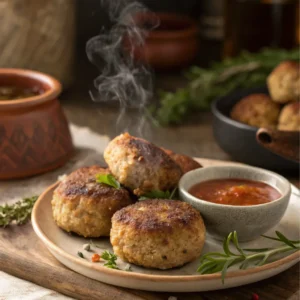
Think of these as the delicious middle ground between a meatball and a burger — seasoned ground beef formed into patties, coated in breadcrumbs, and pan-fried until golden and crisp. They’re easy to make, endlessly adaptable, and kid-approved too!
What makes these beef cutlets so good?
- ✅ Crispy on the outside, tender and juicy inside
- ✅ Quick enough for weeknights, tasty enough for guests
- ✅ Perfect for meal prep — you can freeze and fry later
- ✅ Great with sauces, chutneys, or tucked into a wrap
If you’ve never made cutlets before, don’t worry — I’ll walk you through every step. And if you’re already a cutlet pro, this version might just become your new go-to.
Ready to fry up something delicious? Let’s get started!
Ingredients for Beef Cutlet
Before we jump into shaping and frying, let’s gather everything you’ll need for these crispy beef cutlets. The ingredients are simple and likely already in your kitchen — no fancy ingredients, just seasoned ground beef, some pantry staples, and a few tasty add-ins.
Here’s what to have on hand:
Main Ingredients
- 1 lb (450g) ground beef — use lean or regular, depending on your texture preference
- 1 medium onion, finely chopped
- 2 cloves garlic, minced
- 1/2 teaspoon ground black pepper
- 1/2 teaspoon paprika or chili flakes (optional for heat)
- 1/2 teaspoon salt, or to taste
- 1/2 teaspoon dried oregano or parsley (adds a nice herbal note)
- 1 slice bread, soaked in 2 tablespoons of milk (acts as a binder and keeps cutlets moist)
- 1 egg, beaten — helps the mixture hold together
Optional Flavor Boosters
- 2 tablespoons grated Parmesan — adds umami and depth
- 1 teaspoon mustard — for a mild tang
- 1 tablespoon ketchup or tomato paste — adds moisture and sweetness
🍳 For Coating & Frying
- 1 egg, beaten (for dipping)
- 1 cup breadcrumbs — plain, panko, or seasoned
- Oil for frying — vegetable, sunflower, or canola work best
👩🍳 Ingredient Tips:
- Ground beef: 80/20 beef is ideal — it holds shape without being greasy.
- Breadcrumbs: Panko makes them extra crunchy, but regular breadcrumbs will do just fine.
- No Parmesan? No problem — skip it, or swap with a teaspoon of nutritional yeast for a dairy-free version.
👩🍳 How to Make Beef Cutlets
Now that your ingredients are ready, let’s turn them into golden, juicy beef cutlets with a crispy crust and savory center. This recipe is easy enough for beginners but delivers results like a pro. You’ll mix, shape, coat, and fry — and I’ll guide you through each step like we’re in the kitchen together.
🔄 Step-by-Step Instructions
- Prep the Bread Binder
Tear your slice of bread into pieces and soak it in 2 tablespoons of milk for a minute. Then mash it with a fork into a soft paste. This helps keep the cutlets moist and tender. - Mix the Beef Mixture
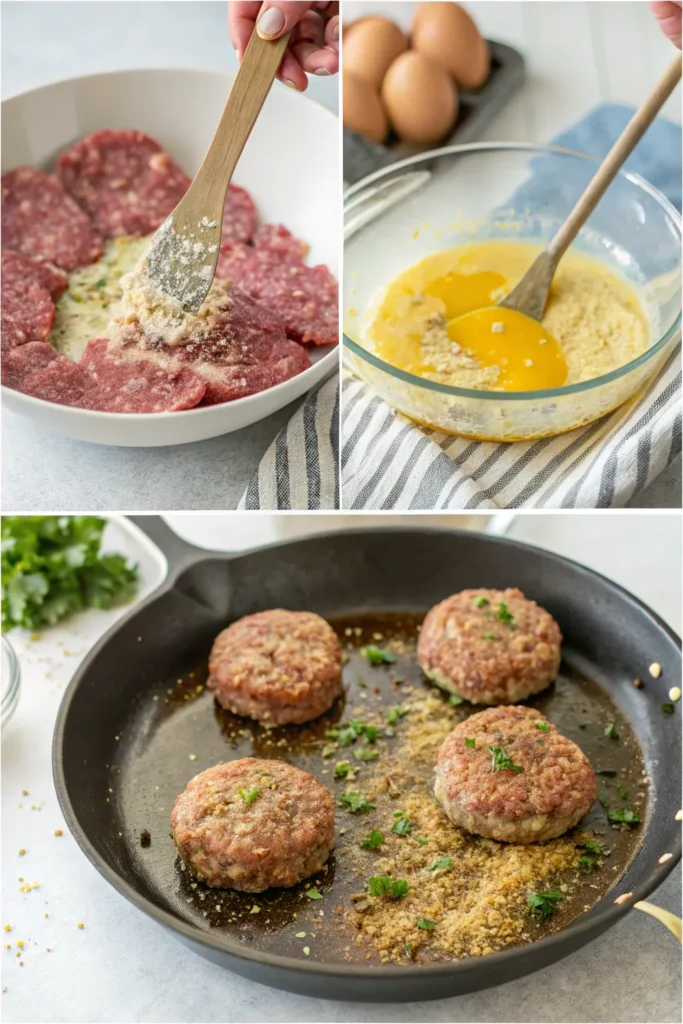
In a large mixing bowl, combine:- Ground beef
- Chopped onion
- Minced garlic
- Soaked bread paste
- Salt, pepper, and herbs
- Paprika or chili flakes (if using)
- Egg
- Optional add-ins like mustard or ketchup
Use clean hands or a sturdy spoon to mix until just combined — don’t overwork it, or your cutlets can turn tough.
- Shape the Cutlets
- Scoop about 2–3 tablespoons of the mixture per cutlet.
- Shape into flat patties, about ½ inch thick.
- If the mix feels too sticky, chill it in the fridge for 15–20 minutes.
- Prepare for Coating
- Beat one egg in a shallow bowl.
- Pour breadcrumbs into another shallow dish.
- Dip each cutlet in egg, then coat evenly with breadcrumbs.
- Set aside on a plate or tray.
- Pan-Fry to Golden Perfection
- Heat 2–3 tablespoons of oil in a nonstick or cast-iron skillet over medium heat.
- Once hot, place 3–4 cutlets in the pan (don’t overcrowd).
- Fry for about 3–4 minutes per side, or until golden brown and fully cooked through.
- Transfer to a plate lined with paper towels.
- Repeat & Serve
Continue frying in batches, adding more oil if needed.
Serve hot with your favorite dip, salad, or side dish.
🍳 Helpful Tips:
- Want a crispier crust? Double dip: egg → breadcrumbs → egg → breadcrumbs.
- Prefer baking? Place on a greased tray, spray with oil, and bake at 400°F (200°C) for 20–25 minutes, flipping halfway.
- Making ahead? Shape and coat the patties, then refrigerate or freeze until ready to fry.
🌟 Tips for Perfect Beef Cutlets
Making a good beef cutlet is simple — but making a great one? That’s where the little details come in. With the right techniques and a few helpful insights, you’ll get cutlets that are juicy, flavorful, and crisp every single time.
Here are my go-to tips to help you nail it:
1. Don’t Overmix the Beef
- Mix until the ingredients are just combined.
- Overworking the beef can make the texture rubbery or dense.
- If you’re unsure, use your hands and stop as soon as the mixture holds together.
🍞 2. Use Bread and Milk for Moisture
- Soaking a slice of bread in milk creates a soft binder that locks in moisture.
- It’s better than using breadcrumbs alone, especially if your ground beef is lean.
- This classic trick helps give your cutlets that tender, melt-in-the-mouth feel.
3. Chill the Mixture Before Shaping
- If the mixture is sticky or loose, place it in the fridge for 15–30 minutes.
- Chilling helps firm it up, making shaping and breading much easier.
- Bonus: the flavors meld better during this time too.
4. Go Big on Flavor
- Don’t hold back on seasoning — ground beef needs a good hit of salt, pepper, and spices.
- A little garlic, onion, mustard, or chili can add amazing depth.
- Taste a small cooked sample of the mixture if you want to adjust before shaping the full batch.
🔥 5. Master the Frying
- Use medium heat — too hot and the crust will burn before the inside cooks.
- Shallow frying with enough oil to cover the bottom of the pan gives the perfect golden crust.
- Always drain on paper towels to keep them crispy (not greasy).
6. Make It Ahead for Less Stress
- You can shape and bread the cutlets, then store them in the fridge (up to 24 hours) or freezer.
- If freezing, place cutlets on a tray to freeze individually before storing in bags.
- Cook directly from frozen — just add an extra minute or two per side.
With these simple but powerful tips, your homemade beef cutlets will be crisp outside, juicy inside, and bursting with flavor. Coming up next: some tasty variations you can try to change up the classic version without losing its charm.
🔄 Variations You Can Try
One of the best things about a beef cutlet recipe is how flexible it is. You can tweak the ingredients, switch up the spices, or change the cooking method — and still end up with something delicious. Whether you’re looking to add heat, go dairy-free, or sneak in some veggies, here are a few tasty ways to make the recipe your own.
1. Spicy Beef Cutlets
Turn up the heat with just a few simple additions:
- Add 1 finely chopped green chili or a dash of hot sauce to the meat mix
- Use smoked paprika instead of regular for a deeper flavor
- Serve with a spicy dipping sauce like sriracha mayo or chili garlic chutney
Perfect for those who like bold, punchy flavors.
2. Cheesy Stuffed Cutlets
Want to surprise your guests with a melty center?
- Place a small cube of mozzarella or cheddar cheese in the middle of each cutlet while shaping
- Seal well so the cheese doesn’t leak out during frying
- Fry as usual and enjoy the gooey goodness inside
This variation is always a hit with kids (and adults too).
3. Vegetable-Boosted Cutlets
For a lighter or more nutritious twist:
- Add grated carrots, finely chopped spinach, or zucchini to the beef mixture
- Make sure to squeeze out excess moisture from the veggies before mixing
- Adjust breadcrumbs as needed if the mixture becomes too soft
Great for picky eaters or anyone trying to sneak more veggies into meals.
🌿 4. Herb-Infused Cutlets
Add a touch of freshness and aroma:
- Mix in fresh parsley, cilantro, or mint
- Use dried Italian seasoning for a Mediterranean spin
- Serve with a light yogurt dip or herbed aioli
These are perfect for brunches or light lunches.
5. Baked or Air-Fried Cutlets
Skip the pan-frying for a healthier option:
- Bake at 400°F (200°C) for 20–25 minutes, flipping halfway through
- Or air-fry at 375°F (190°C) for 15–18 minutes until golden
- Lightly brush or spray with oil for extra crispness
You’ll get all the crisp texture with less mess — and less oil.
Whether you like them spicy, cheesy, veggie-packed, or baked to perfection, these beef cutlet variations make the recipe feel brand-new each time you make it. Next, let’s take a look at what pairs best with your golden, crispy cutlets!
What to Serve with Beef Cutlets
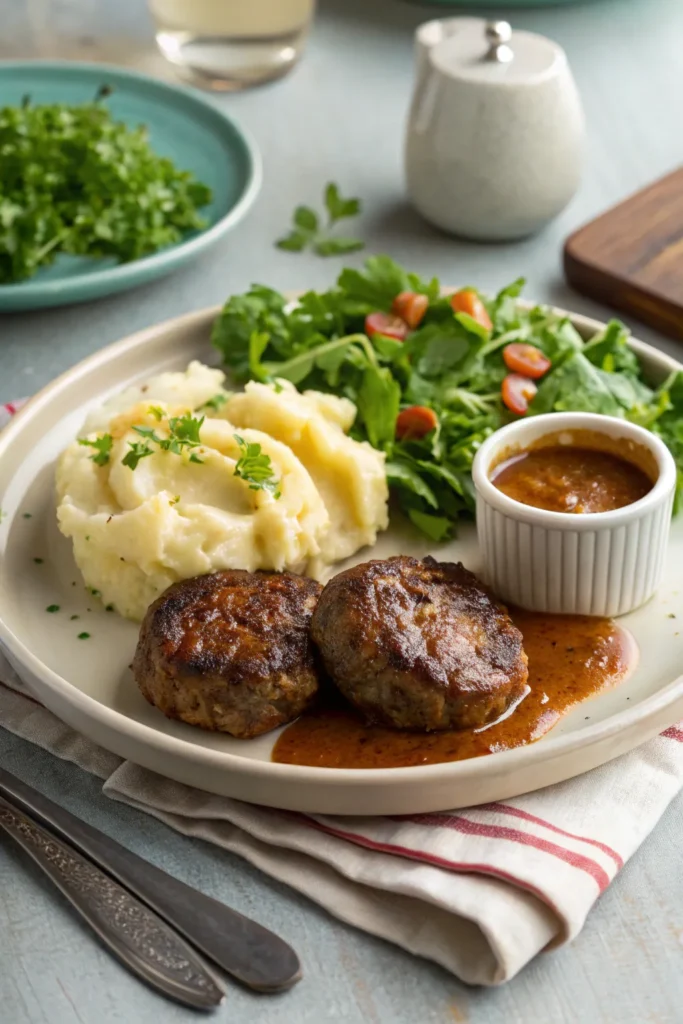
Once your beef cutlets are fried to crispy perfection, it’s time to think about what to serve alongside them. Whether you’re planning a full dinner, a casual lunch, or just a party platter, these side options help turn your cutlets into a satisfying, well-rounded meal.
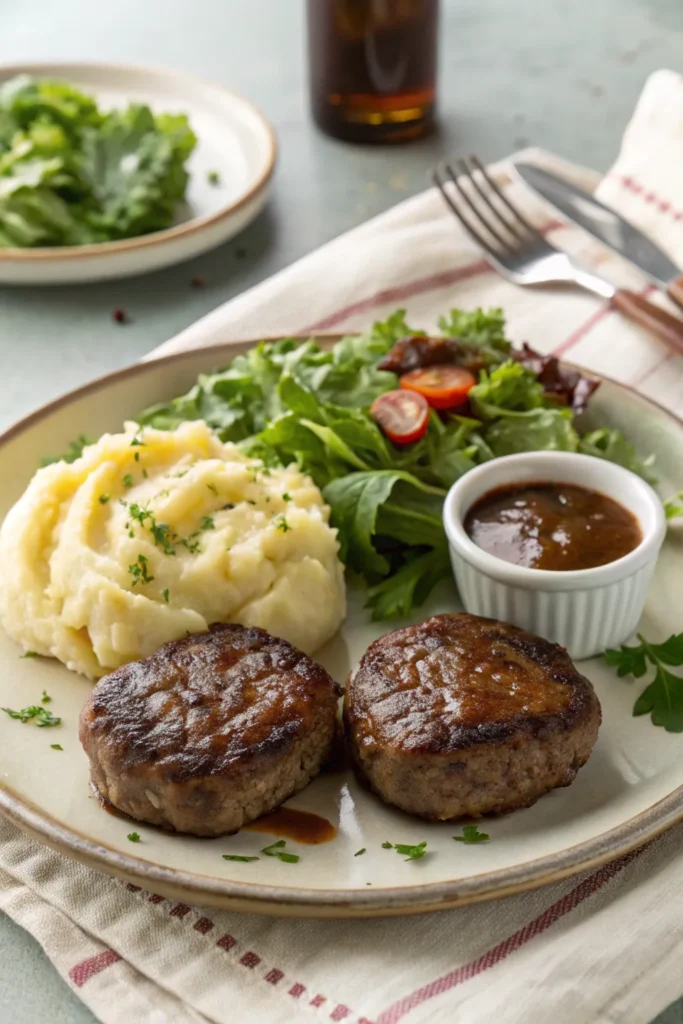
Classic Comfort Sides
- Mashed potatoes — creamy, buttery, and the perfect contrast to crispy cutlets
- French fries or potato wedges — for that irresistible crunchy combo
- Buttered rice or pilaf — simple and satisfying with juicy cutlets on top
- Mac and cheese — for the ultimate comfort food pairing
These are great when you’re serving cutlets as a main dish.
Light and Fresh Pairings
- Green salad with vinaigrette — adds brightness and balances richness
- Coleslaw — crunchy, tangy, and easy to prep ahead
- Cucumber yogurt salad (raita) — especially refreshing if your cutlets are spicy
- Steamed or roasted vegetables — like green beans, carrots, or broccoli for a wholesome touch
These sides make your plate lighter and add some color and crunch.
For Snacking or Entertaining
If you’re serving your beef cutlets as finger food or party snacks, try:
- Mini sandwich sliders — place cutlets in small buns with lettuce and sauce
- Flatbreads or wraps — roll up sliced cutlets with veggies and dip
- Skewered cutlet bites — cut into pieces and serve on toothpicks with dips
Great for game nights, brunch spreads, or appetizer boards.
Dips and Sauces to Elevate Every Bite
A good sauce makes a big difference. Try these:
- Garlic aioli or herbed mayo
- Tomato ketchup or spicy sriracha
- Mint chutney or green chili dip
- Barbecue or honey mustard sauce for a smoky-sweet combo
The beauty of a beef cutlet recipe is how versatile it is — you can dress it up with a full spread or keep it simple with a dipping sauce and a crunchy salad. Up next, let’s explore how to store leftovers or make these ahead for stress-free meal prep!
Make-Ahead and Storage Tips
One of the best parts about this beef cutlet recipe? It’s incredibly make-ahead friendly. Whether you’re prepping for a busy weeknight or planning ahead for guests, these cutlets are easy to store and reheat without losing flavor or texture. Here’s how to do it right.
🕒 Make-Ahead Options
Want to save time on the day of serving? Try these:
- Option 1: Prep and Chill
Mix and shape the cutlets, coat them in breadcrumbs, and refrigerate (uncooked) for up to 24 hours. Just take them out when ready to fry. - Option 2: Freeze for Later
After breading, place the uncooked cutlets on a tray lined with parchment and freeze until solid. Then transfer them to a zip-top freezer bag or airtight container. They’ll keep well for up to 2 months. - Cooking from frozen?
Yes, you can! Just add an extra 2–3 minutes per side while frying or baking. No need to thaw.
How to Store Leftovers
Cooked a big batch? Here’s how to keep them fresh:
- In the fridge:
Place cooled cutlets in an airtight container. Store for up to 3–4 days. - In the freezer:
Wrap individually or layer with parchment between them. Freeze for up to 1 month. Reheat directly from frozen.
🔁 Reheating Without Losing the Crunch
- Pan-fry: Heat with a splash of oil over medium heat until warm and crispy.
- Oven: Bake at 350°F (175°C) for 10–12 minutes. Flip halfway through.
- Air fryer: Reheat at 375°F (190°C) for 6–8 minutes — works like a charm!
Avoid the microwave if possible — it softens the crispy coating and makes the texture less appealing.
With just a bit of planning, you can enjoy these crispy beef cutlets fresh or straight from the freezer. Next up, I’ll answer a few common questions home cooks often ask when making cutlets — so you feel confident every step of the way.
FAQs
If it’s your first time making homemade beef cutlets, it’s normal to have a few questions. Here are some quick, helpful answers to the things readers ask most — with real tips to help you get it right the first time.
Can I use a different type of meat instead of beef?
Absolutely! While this is a beef cutlet recipe, you can easily swap in:
- Ground chicken for a lighter version
- Ground turkey for a leaner option
- Lamb or pork if you want a richer flavor
Just keep in mind that leaner meats may need extra moisture — like a spoonful of olive oil or grated veggies.
What if my cutlets fall apart while frying?
This is usually a binding issue. Try these fixes:
- Make sure you’ve added enough egg and soaked bread
- Don’t skip chilling the mixture before shaping
- Avoid overmixing — it can break down the texture and make them too soft
Can I bake instead of fry?
Yes! For a healthier twist:
- Place cutlets on a greased baking tray
- Spray lightly with oil
- Bake at 400°F (200°C) for about 20–25 minutes, flipping halfway
You can also use an air fryer for a similar result with less mess.
How do I make these cutlets gluten-free?
No problem! Just make a couple of easy swaps:
- Use gluten-free breadcrumbs or crushed rice crackers
- Substitute regular bread with a GF bread slice for the binder
They’ll turn out just as crispy and delicious.
Can I freeze them after cooking?
Yes! Let cooked cutlets cool completely, then:
- Store in an airtight container or freezer bag
- Reheat in a skillet or air fryer for best texture
They’ll keep well in the freezer for up to 1 month.
beef cutlet recipe
Ingredients
For the Beef Mixture:
- 1 lb 450g ground beef
- 1 medium onion finely chopped
- 2 cloves garlic minced
- 1 slice of bread soaked in 2 tbsp milk
- 1 egg beaten
- 1/2 tsp black pepper
- 1/2 tsp salt or to taste
- 1/2 tsp paprika or chili flakes optional
- 1/2 tsp dried oregano or parsley
- 1 tbsp ketchup optional for moisture
- 1 tsp mustard optional for flavor
- 2 tbsp grated Parmesan optional for richness
For Coating & Frying:
- 1 egg beaten
- 1 cup breadcrumbs regular or panko
- Oil for shallow frying vegetable or sunflower oil recommended
Instructions
Soak the Bread
- Tear the slice of bread into small pieces and soak in milk until soft. Mash into a paste with a fork.
Make the Beef Mixture
- In a large bowl, combine the ground beef, chopped onion, garlic, soaked bread paste, egg, salt, pepper, paprika, herbs, and any optional ingredients. Mix gently until everything is just combined.
Shape the Cutlets
- Divide the mixture into equal portions and shape into flat oval or round patties, about ½ inch thick.
Coat the Cutlets
- Dip each patty into the beaten egg, then coat with breadcrumbs on all sides. Place on a tray.
Chill (Optional but Recommended)
- Refrigerate the breaded cutlets for 15–30 minutes to help them firm up and hold their shape during frying.
Pan-Fry Until Golden
- Heat oil in a skillet over medium heat. Fry the cutlets in batches, about 3–4 minutes per side, until golden brown and cooked through. Transfer to a paper towel–lined plate.
Serve and Enjoy
- Serve hot with ketchup, garlic sauce, or a side salad. Enjoy your crispy, juicy beef cutlets!